Is this not the perfect gift from the little guy to his dad? The hearts are made from vintage electrical plans. He personalized it with a little heart-shaped photo which he attached to the twine. Quite crafty for a 17-month old, yes? (Okay, so he had some help from mom :)
Showing posts with label modern crafting. Show all posts
Showing posts with label modern crafting. Show all posts
Thursday, February 14, 2013
Monday, January 21, 2013
Original cards

I found this great vintage hammer artwork, and used just a crop of it slightly askew on a fold-over card made from an 8.5x11 cut in half and then folded. (By the way, I recently discovered the most amazing matte photo paper and it makes fantastic cards, too since it feels nothing like photo paper, yet prints like photo paper. It's by OfficeMax and it's their Matte-Professional).
This card was for a builder client and to me the personal, handmade quality makes it more special than anything store bought. And they are so easy to make!
Labels:
antiques and vintage,
modern crafting
Friday, November 30, 2012
Holiday project #2: Photo Garland
This was one of the most fun projects... I had visions of garlands dancing in my head and this is where I ended up, with inspiration coming from these amazing little clippy-hooks, and a desire to use nostalic-feeling, winter-wonderland-y photos. I relied on my trusty ball of twine and super-fancy 1/8" hole punch (I think it's 1/8 ... maybe 1/4 who can keep track) and started hunting down some of our own favorite winter time pictures. I used lightweight matte photo paper and lightened the photos a bit to give them a slighty aged look. The white borders were easy thanks to my paper trimmer (best invention ever) and I left extra white space at the tops to give the hole punch some breathing room. It definitely feels festive but at the same time pure, simple, and beautiful... which I guess you could say is our guiding theme this holiday :)
Labels:
fall and winter,
holiday,
metals,
modern crafting
Wednesday, May 16, 2012
A pop of sunshine
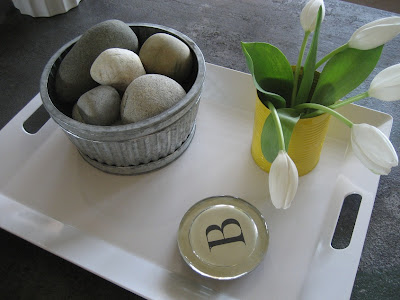
I got a little yellow fix. Just an empty San Marzano tomato can I spray painted, nothing for the husband to have fretted about. So sweet with these flowers, is it not? And when my peonies open up, those babies are so going in there.
Labels:
color,
decorative accessories,
modern crafting
Monday, October 24, 2011
Fresh mail
OK, so I'm a little out of sequence here, but thought I'd share an easy way to achieve a cohesive look and feel for thank you notes and announcements (or really any event that dictates more than one mailing :).
I wanted to find a fresh and simple (read: Modern Cottage) approach to our new little one's birth announcements and thank you notes. I couldn't find anything ready-made that I liked... I thought monogrammed cards would be cute, but I didn't care for any of the ones I saw - wrong colors and fonts and such. Instead, I simply chose some blank cards and envelopes in the colors of my liking and stamped an initial myself. Since our nursery colors and fabrics are menswear-inspired (charcoal greys, crisp whites, chambray, and textural grey-brown tones) with little hits of green, I chose ink in the color "lettuce" to go atop bright white cards. The envelopes are the perfect cementy-khaki color. The classic monogram stamp on the front looks sweet and simple, just what I was going for.
We also got some white ink to use on the gravel colored envelopes for the birth announcements (still in progress... also homemade!). It's fun and unexpected to see the little stamp on the backside of the envelope.
All of the materials were purchased at Paper Source which I adore. An easy way to get a custom, understated look for almost any occasion!
Labels:
baby and kids,
modern crafting,
personal
Monday, April 4, 2011
Fun with paper
Saw this done recently (with humans :) and decided the other day what a delight it would be to honor Scout this way - a dog silhouette! It was ridiculously simple. I already had the frame, so we just ventured to the craft store to pick out some colorful card stock papers. Of course Scout had to pose in profile (he is quite good in front of the camera, has been since he was a pup), his reward being a couple of peeled baby carrots. Then I cropped and sized the photo appropriately for the 8x10 opening of the frame and printed it out:
Next we chose the paper...it's so inexpensive, we brought home a few options knowing we'd find a use for what was left soon enough.
Then we simply (and haphazardly - I was anxious to get to the end result) taped the two together and I cut out along Scout's profile. I taped the left edge and bottom edge flush so I only had to cut the other two sides.
I then mounted the resulting paper cut out onto a piece of white cardstock to fill up the rest of the 8x10 opening. And voila! Cutest profile ever. And it really does look just like him, from the tiny bump on his head to the nose. Talk about instant gratification!

Labels:
art,
color,
greens,
mod appeal,
modern crafting,
scout
Subscribe to:
Posts (Atom)


